We take many steps to ensure you have a productive and engaging learning experience in our online (virtual) classroom but we need you to check three simple areas on your IT setup before your training session. Contact us on 02079873777 or info@stl-training.co.uk if you need support with the below.
Please note that if you are attending a training on Power BI or MS Project applications you will need to read and follow the extra instructions at the end of this page. These extra checks and setup steps are essential for the Training
1. Check your setup
Must have:
- Laptop or Desktop Computer (every delegate needs a dedicated device)
- Webcam (interactive learning works when you can see everyone)
- Reliable internet connection (try using a network cable plugged into your router to improve the connection)
- Computer Audio (laptop speakers are the default option, using a headset prevents feedback from others if they are nearby. Sharing audio in a meeting room doesn’t work )
- Second computer screen (essential for technical/apps training and optional for professional development/management training)
A second computer screen is not essential for professional development/ Management training courses as the learning happens on the primary screen
A second computer screen is essential for apps training courses like Excel, PowerPoint and Power BI, and essential when attending higher levels of these Apps. The learning happens on your primary screen and you interact with the app on your secondary screen at the same time. N.B. If you have a large single screen this is an exception if you use the “window productivity shortcuts” below.
If your typical IT setup doesn’t have 2 screens, please try one (or more!) of the following tips:
-
- Use an additional monitor or your TV as a second screen by connecting it to your computer using a HDMI cable. (to setup 2 screens just see the video below)
- Use a large single screen with these “window productivity shortcuts” – By holding down the “Alt” key and the “Tab” key you can easily jump between your application and main Microsoft Teams session screens. You can also split your screen in two by using the “Windows” key and the left/right cursor keys to tile two windows side by side on your one screen
- Use your tablet/second laptop as a companion device to follow/interact with the online training session. You can continue to use your computer to practice and follow the trainer’s instructions for the application you are learning. (see below for full instructions on adding your companion device to your online meeting session)
If you are still unsure of any of the above then let your IT Team know so they can assist and inform us ASAP so we can support.
Please avoid using a small laptop screen alone to work on the application and then trying to follow the Trainer’s screen share by implementing at least ONE of our recommended tips above. This will save you from a reduced learning experience!
If you’ve never used two screens before, watch our short video below explaining how to set up, connect and manage two screens in a training session.

[If you interact with the embedded video above and your browser is set to allow cookies, you agree for this 3rd party service to create and store local 3rd party cookies on your device.]
2. Test MS Teams
Click here to join a test event and check your connection.
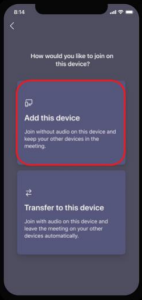
This will open the page below, giving you three options for how to join:
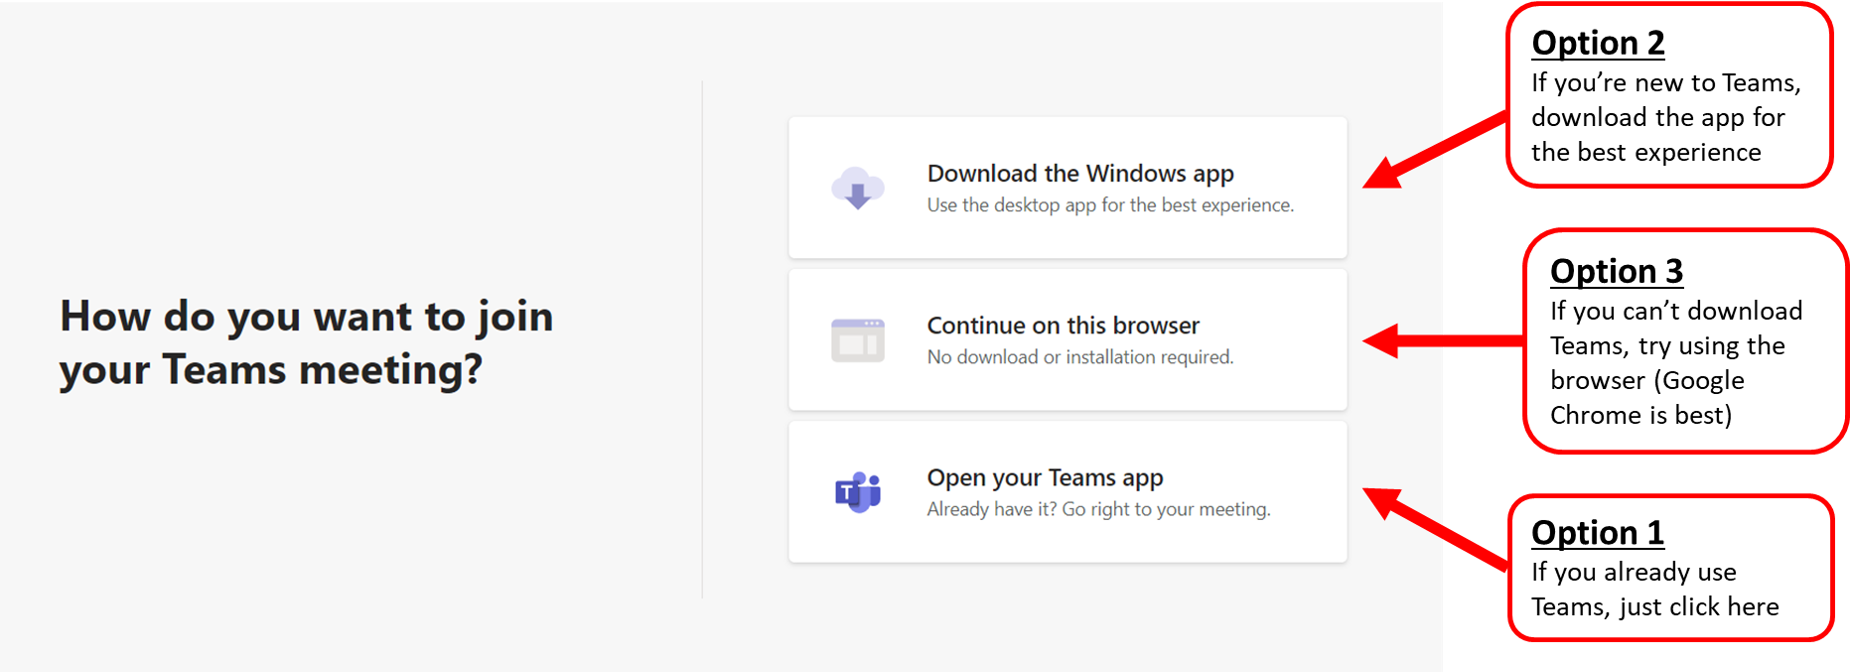
We recommend you download the Teams app if you don’t already have this installed – click here to download now.
Alternatively, make sure you have a supported browser installed so you can “continue on this browser” – Google Chrome or Microsoft Edge work best
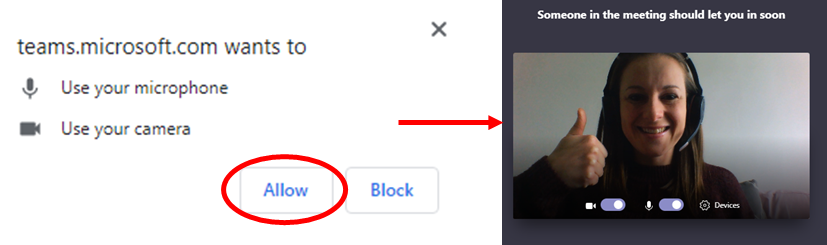
Other useful tips:
- Make sure you ‘allow’ Teams to use your microphone and webcam
- If everything is working properly you should see a preview screen of your smiling face (preview below)
- This useful walk-though from Microsoft might help you through the process
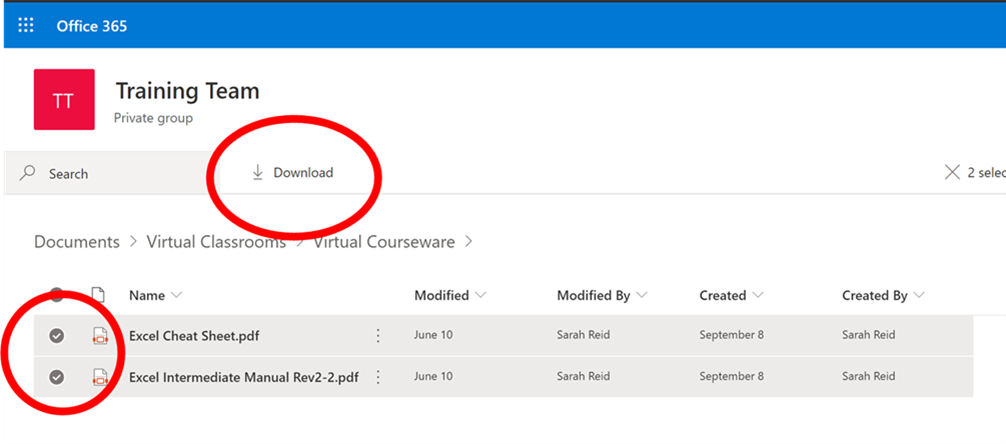
3. Download your courseware
Click on the link in your online classroom instructions, then make sure you select all files and click download when you open the folder.
See an example below:
If you have any questions or problems with joining the online classroom, please contact us.
If you are attending a training course for Power BI or MS Project, please read and follow the extra instructions below:
Setup for Power BI courses
Before your training course, make sure you:
- Download the latest version of Power BI desktop (Must be 64 bit version as the 32 bit version is too slow) – https://powerbi.microsoft.com/en-us/downloads/
- Check Power BI Desktop opens on your Laptop/PC (Windows only for Power BI). Check it has enough memory as this is a resource intensive course (Recommended 8GB RAM and i5 Intel Processor or equivalent)
- Set up your IT so there are 2 screens. This is very important because Power BI is a complex program, so you need 2 screens to see the tools properly and follow the training. You may have 2 screens already, which is great! If not, try connecting a TV screen to your computer using a HDMI cable. Alternatively, you can use both your work laptop to run Power BI and a second personal laptop to log into Teams and follow the trainer’s screen. If you have any question please contact your IT Team immediately and let us know before the Training session
Watch our video explaining two-screen set up here
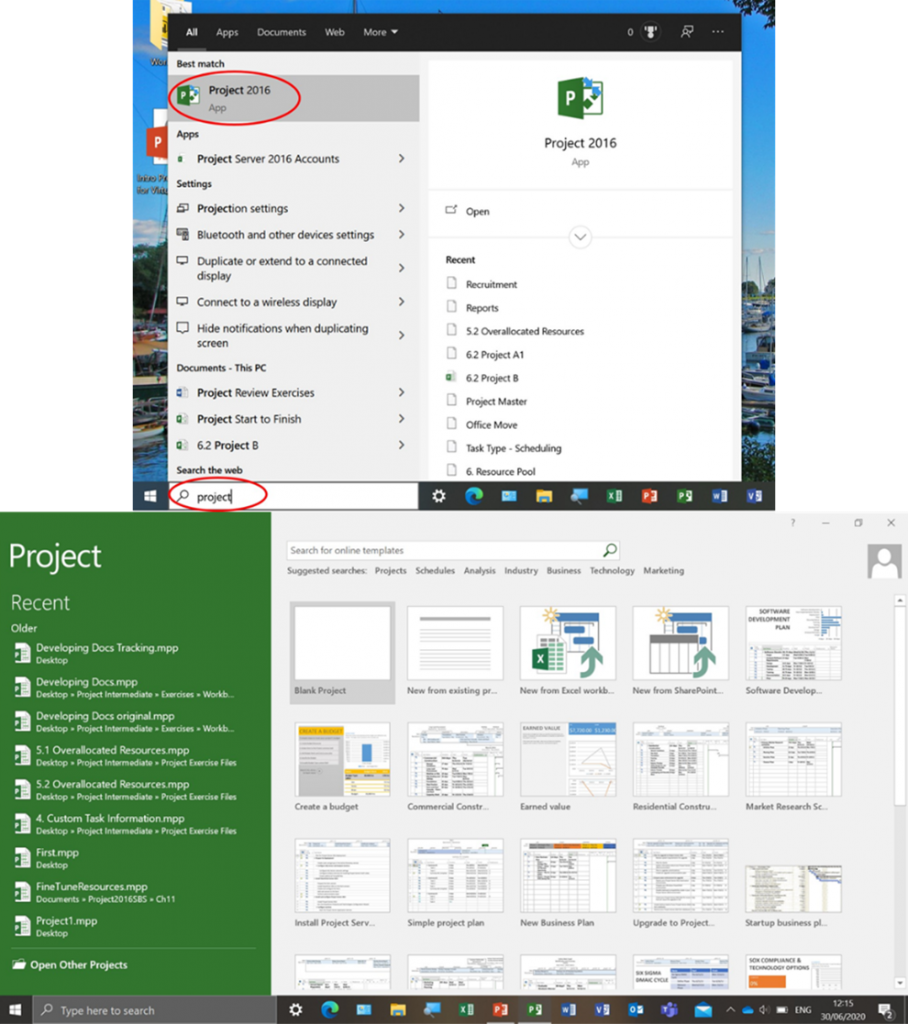
Setup for MS Project courses
It is essential that your have Project Desktop installed correctly on your computer for the Introduction, Intermediate or Advanced course follow these steps to check your setup:
- Go to the Windows search box on the left side of the taskbar
- Search ‘Project’
- If Project is installed on your computer, it will appear as an option
- Select the Project app (don’t worry if it doesn’t say 2016 or 2019)
- This will open the Project window, and you are all good to go! Please let us know if you don’t have Project installed.
If you are attending Project Online Training please make sure you have logged to Project Online and tested your access (Please note that Project for the Web is a simpler tool and is different to Project Online, check with your IT Department which version you have if you are not sure Compare Microsoft Project options)
Add your Tablet/iPad as a companion device to a online meeting
If you’ve joined a meeting on your laptop, you have the option to join it
on your tablet/iPad/other device at the same time.
While you’re in a meeting on one device, open the Teams
meeting on the second one. (Just follow the steps in “2. Test MS Teams” above)
Once you have opened the meeting, tap Add this device.
To prevent an echo effect, ensure that the camera, microphone, and
outgoing audio are only turned on on one device. Teams should
automatically turn off the speaker, camera, and mic on the second
device before it enters the meeting, however, you can also do this
manually.

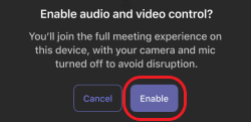
1. To turn on your speaker, just tap Speaker at the bottom of
your screen.

2. To turn on your camera or mic, tap Camera or Mic at the
bottom of your screen.

3. Then tap Enable.
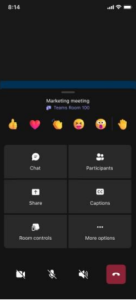
Now you can use your speaker, camera, or mic as needed.
You can also chat, react, and interact from your second device:
Leave a meeting on all devices
Finally, to ensure your privacy, remember to leaving your meeting from
all the devices you joined on.