Adding a screenshot to a Word 2010 document is easier than I thought and gives my work a professional edge. Here’s how to do it.
- Go to the screen you want take the screenshot from.
- Press the Print Screen button on they keyboard. (Word 2010 will save this into the gallery…)

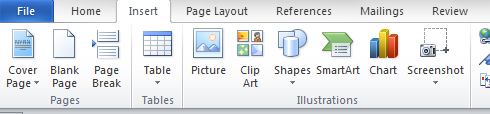
Screenshot button in the Insert tab
- Go back to the Word document and put your cursor where you want the screenshot to go.
- Then click on the Insert, and then Illustrations and select the Screenshot button.
- Word 2010 will then show a gallery of screenshots, and you can click on the one you want.
- Ta da!
