Documents evolve over time and with the input of others. Tracking changes is a perfect for editing Word documents as you can see any sections that have been deleted, had format changes or include new content.
With tracking tools you can control the changes by accepting or rejecting suggestions and approve the final version.
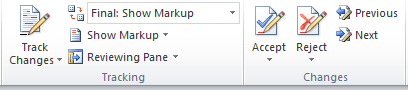
To access the Track Changes options, you need to use the Review tab.
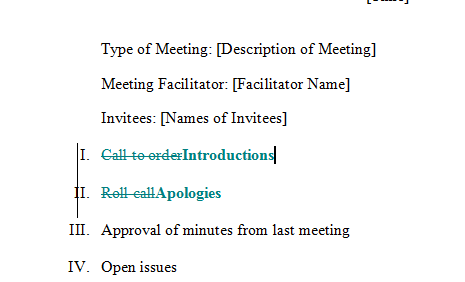
If I click on Track Changes, the button changes to yellow (to show that I’ve applied it) and now, when I type in new content, it appears in red font with deletions crossed through and changed to red font.
Now, if red pen brings back bad memories of C- scores in essay writing, how about changing the way the tracking is shown? When you click on the down arrow below the Track changes button, you can select the Tracking options menu, giving you the choice of how to show changes.
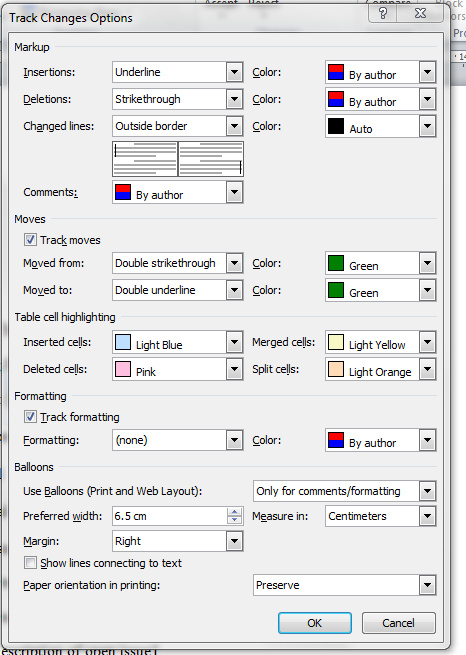
Customise the tracking style. For my example document, I decide to use teal for the font colour for new content and for the strike-through of deletions. Teal is a bit easier on the eye I think. I click OK, and the new colour is applied.
Using tracking views
I can customise the way tracking is viewed to speed up my work.
- Final: Show Markup
This view shows any edited content and formatting with the track changes text in red (or other) colour or strike-throughs for deletions. - Final
This view shows the content with all the changes in place. You won’t see all the track changes colour or deletions. - Original: Show markup
This view shows your original document and includes all the edits that have been made. - Original
This view shows you the document at the beginning before you made any changes or edits.
Tip: Remember to check which view you are using before emailing your final version, as you may also be sending them all the comments and changes.
Accepting or rejecting changes
You’ve tracked all the changes, and now you need to sort through them and accept or reject them. The buttons you need for this are next to tracking in the Changes section.
You can whizz through the document from start to finish, or work in sections – either way, you can use the different views and the changes buttons to work through the edits.
Once you have explored these tracking tools, you can build on your skills to include more intermediate and advanced techniques. I’m working my way through tracking and more with Microsoft Word Training at the moment. If you want to find out more about the skills you can learn, take a look at: https://www.stl-training.co.uk/word-training-london.php