Adding comments to an Excel spreadsheet helps when you are sharing a worksheet with colleagues. You can add extra information to a figure in a cell, use to note trends, or add an action note.
The comments are hidden when you are working in your normal worksheet view, but you know a comment has been added by the little red triangle in the top right of the cell, If you put your cursor over the cell, the message appears as a yellow post-it style note.
To add a comment to a worksheet
Click on the cell you want to add a comment to. Then go to the Review tab, and the Comments group.

I can edit a comment or add to one made by another colleague, by selecting the comment, and using the Edit comment button.
Viewing comments
In a large worksheet, you may want to review all the comments quickly. Excel can take you through each one in turn if you select Review tab, then in the Comments group, select Next. Excel saves you scrolling through lots of data to find notes, by whizzing you through the document and locating the notes you need.
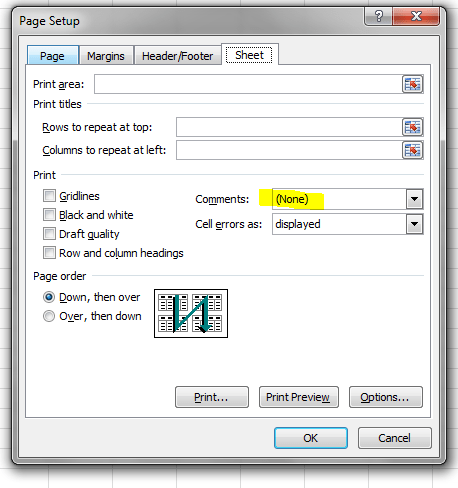
Printing comments in a worksheet
It can help when reviewing an Excel worksheet in a meeting, if you can have a print out of the sheet with the notes at the bottom of the sheet, or where they appear on screen. If you hit Print, the comments don’t appear.
Go to the Page Layout tab and select the Page Set Up, and select the down arrow next to Comments. This is where you can select the option that fits your needs. Now when you print your document, you have access to the comments.
With comments, you have the flexibility to add extra details to your Excel worksheet, without it taking up lots of space. It is easier to share comments with colleagues and get more out of your data. Consider training-courses-in-excel for more Excel skills https://www.stl-training.co.uk/excel-2010-intermediate.php
